Complete Guide: Setting Up Guest Wi-Fi on MikroTik with TheWiFy
Step-by-step tutorial to configure secure guest Wi-Fi on your MikroTik router using TheWiFy's cloud authentication engine.
What You'll Learn
Prerequisites
Before you begin, make sure you have:
- A MikroTik router (RouterOS 6.x or 7.x)
- Admin access to your MikroTik device
- A TheWiFy account (sign up for free trial)
- Basic understanding of networking concepts
Step 1: Create Your TheWiFy Account
First, sign up for TheWiFy and create your business profile:
- Visit TheWiFy.com and click "Start Free Trial"
- Enter your business details (name, locations, contact info)
- Verify your email address
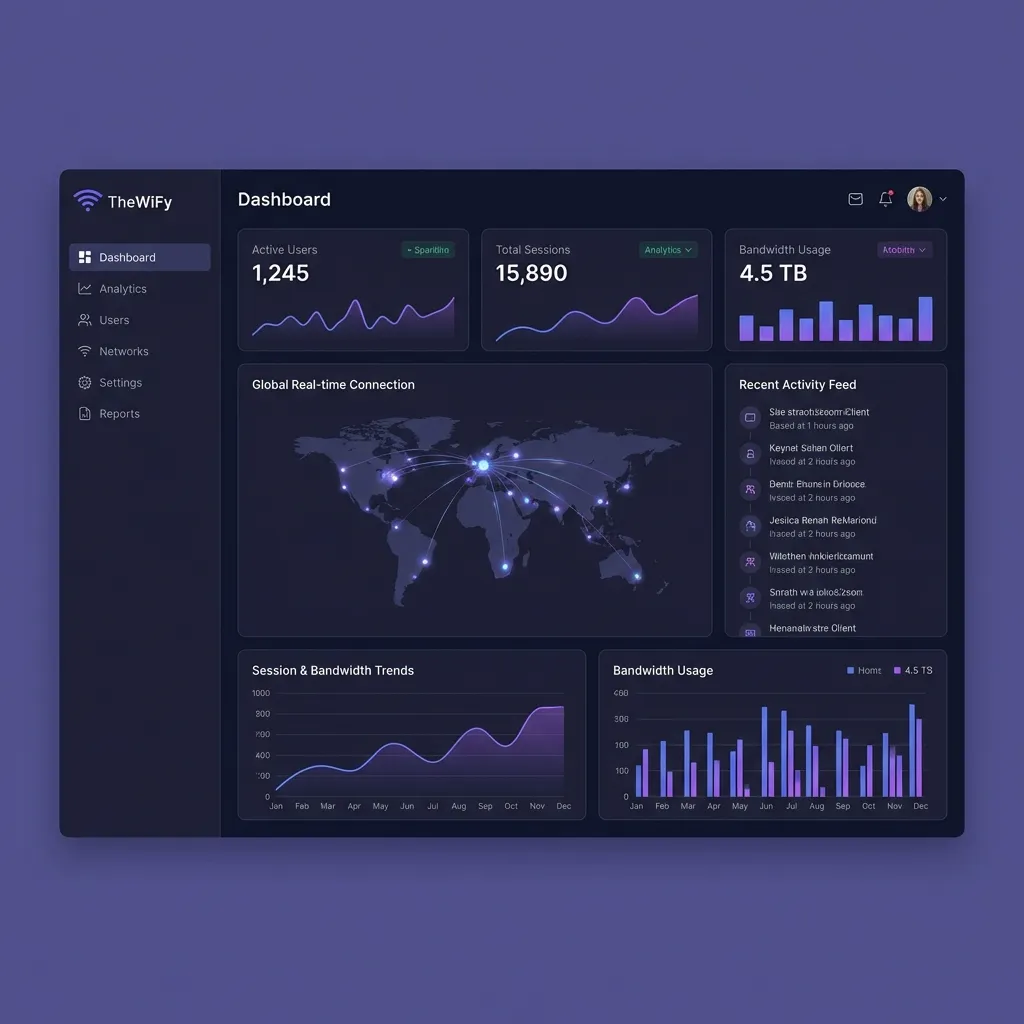
- Access your dashboard and navigate to "Routers" section
TheWiFy Dashboard — Router Configuration Section
Step 2: Get Your RADIUS Credentials
TheWiFy provides cloud-based RADIUS authentication. In your dashboard:
- Click "Add New Router" in the Routers section
- Enter your router's public IP address
- Copy the RADIUS server details:
- RADIUS Server: radius.thewify.com
- RADIUS Port: 1812 (Auth) / 1813 (Accounting)
- RADIUS Secret: (unique per router)
⚠️ Important Security Note
Keep your RADIUS secret secure. Never share it publicly or commit it to version control.
Step 3: Configure MikroTik Hotspot
Now, let's configure your MikroTik router to use TheWiFy's cloud authentication:
3.1 Access MikroTik Winbox or WebFig
Connect to your MikroTik router using Winbox or WebFig (web interface).
3.2 Add RADIUS Server
Navigate to: RADIUS → Add New
Service: hotspot
Address: radius.thewify.com
Secret: [your-radius-secret]
Authentication Port: 1812
Accounting Port: 1813
3.3 Configure Hotspot Server Profile
Navigate to: IP → Hotspot → Server Profiles
- Enable "Use RADIUS" for authentication
- Enable "Use RADIUS" for accounting
- Set login page to your TheWiFy captive portal URL
Step 4: Customise Your Captive Portal
TheWiFy provides a visual designer to customise your captive portal:
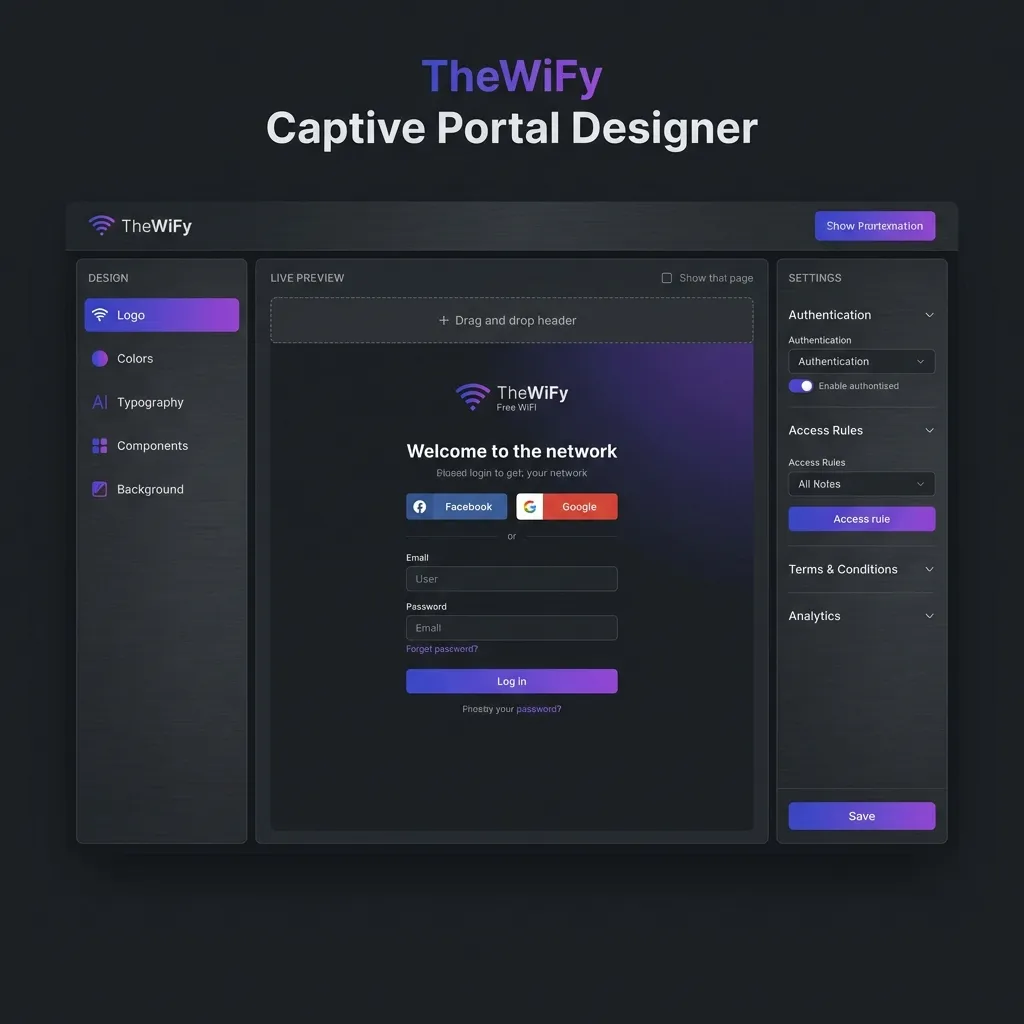
TheWiFy Captive Portal Designer Interface
- Go to "Captive Portals" in your TheWiFy dashboard
- Click "Design Portal" for your location
- Upload your business logo
- Choose brand colours (matches your business identity)
- Customise welcome message and terms
- Select authentication methods (SMS OTP, Email, Social Login)
- Preview and publish your portal
Step 5: Test Your Setup
Before going live, test the complete flow:
- Connect a test device to your guest WiFi network
- Verify the captive portal appears automatically
- Test authentication (try SMS OTP or email login)
- Confirm internet access after successful login
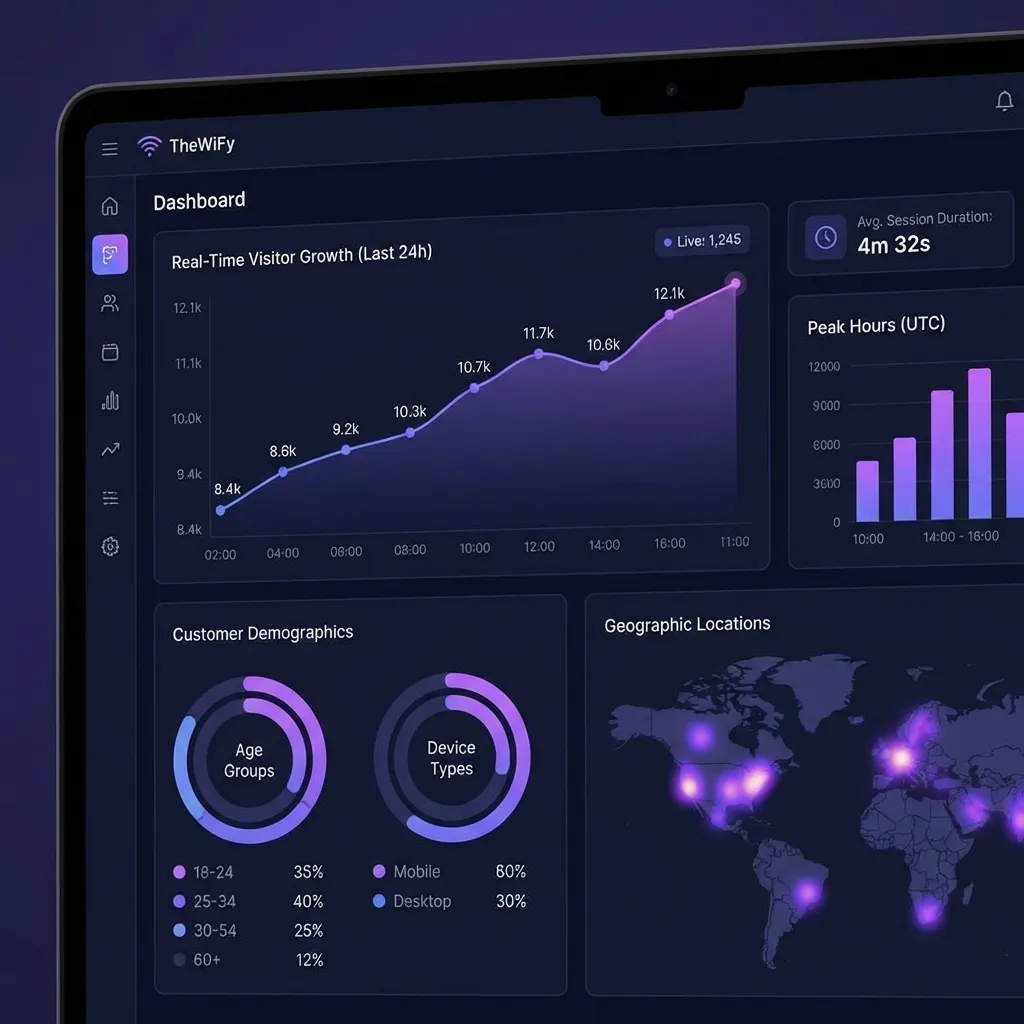
- Check the dashboard for real-time connection data
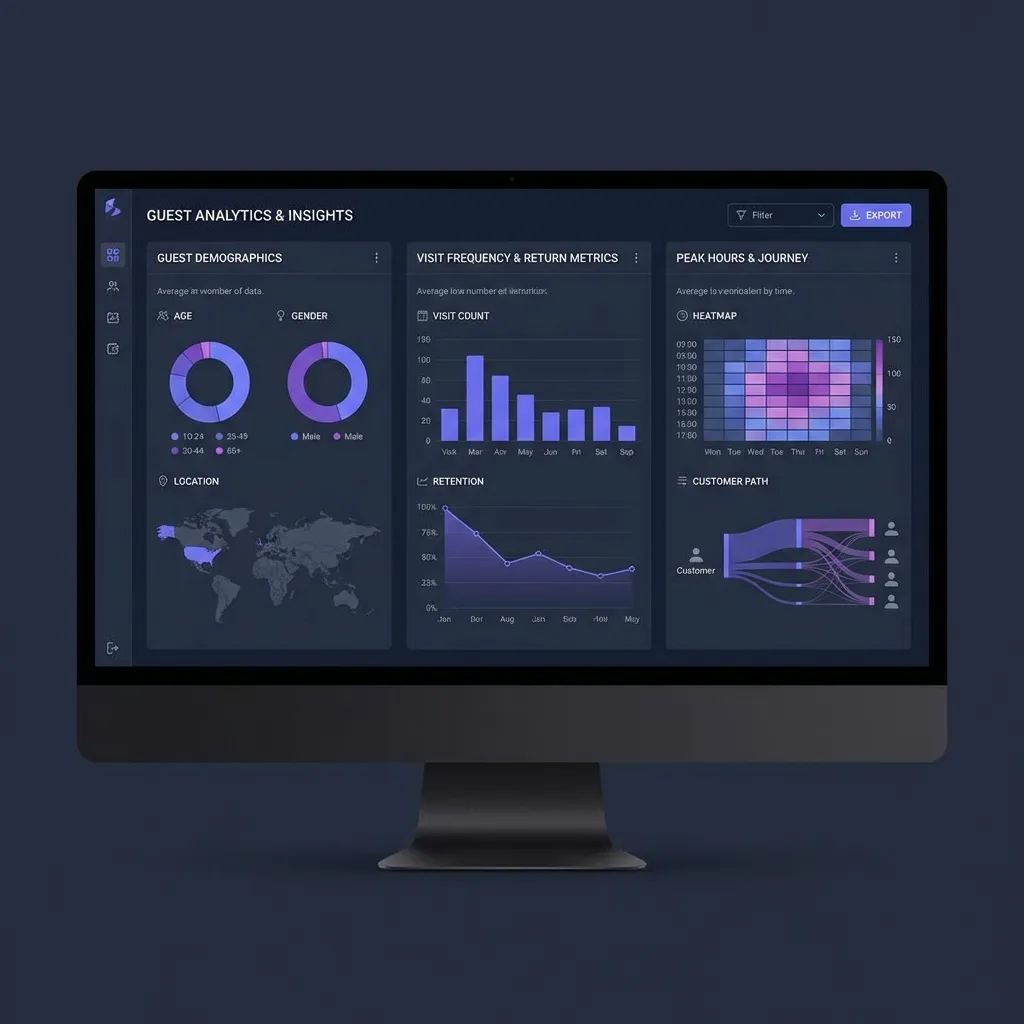
Real-time Guest Analytics and Insights
Advanced Configuration
Bandwidth Controls
Set fair usage limits in TheWiFy dashboard:
- Navigate to "Access Rules" → "Bandwidth Limits"
- Set download/upload speed limits (e.g., 5 Mbps down / 2 Mbps up)
- Configure session duration (e.g., 2 hours per session)
- Set device limits per user (e.g., max 2 devices)
Multi-Location Setup
If you have multiple locations:
- Add each location in your TheWiFy dashboard
- Create location-specific captive portals
- Configure separate routers for each location
- View aggregated analytics across all locations
Troubleshooting
Captive portal not appearing
Check that your hotspot server profile is using the correct login page URL from TheWiFy dashboard.
Authentication failing
Verify RADIUS secret matches exactly. Check router's public IP is whitelisted in TheWiFy.
No internet after login
Ensure NAT is configured correctly on your MikroTik router and firewall rules allow guest traffic.
Next Steps
Now that your guest WiFi is set up, explore these advanced features:
- Set up automated email campaigns for returning guests
- Configure guest data collection and CRM integration
- Enable AI-powered usage optimisation
- Create custom access vouchers for events
Ready to Set Up Your Guest WiFi?
TheWiFy makes it fast to deploy cloud-managed WiFi with branded portals and automated RADIUS.
Book a DemoRelated Articles
Captive Portal Design: Best Practices for Guest Wi-Fi
Learn how to create branded, conversion-optimized captive portals that enhance guest experience and collect valuable data.
Guest Wi-Fi Security & Compliance: Everything You Need to Know
Comprehensive guide to securing your guest Wi-Fi network and ensuring GDPR, HIPAA, and PCI-DSS compliance.

5 Ways Restaurants Use Guest Wi-Fi for Marketing Success
Discover how leading restaurants leverage guest Wi-Fi data to drive repeat visits and increase customer loyalty.